Command Palette
Search for a command to run...
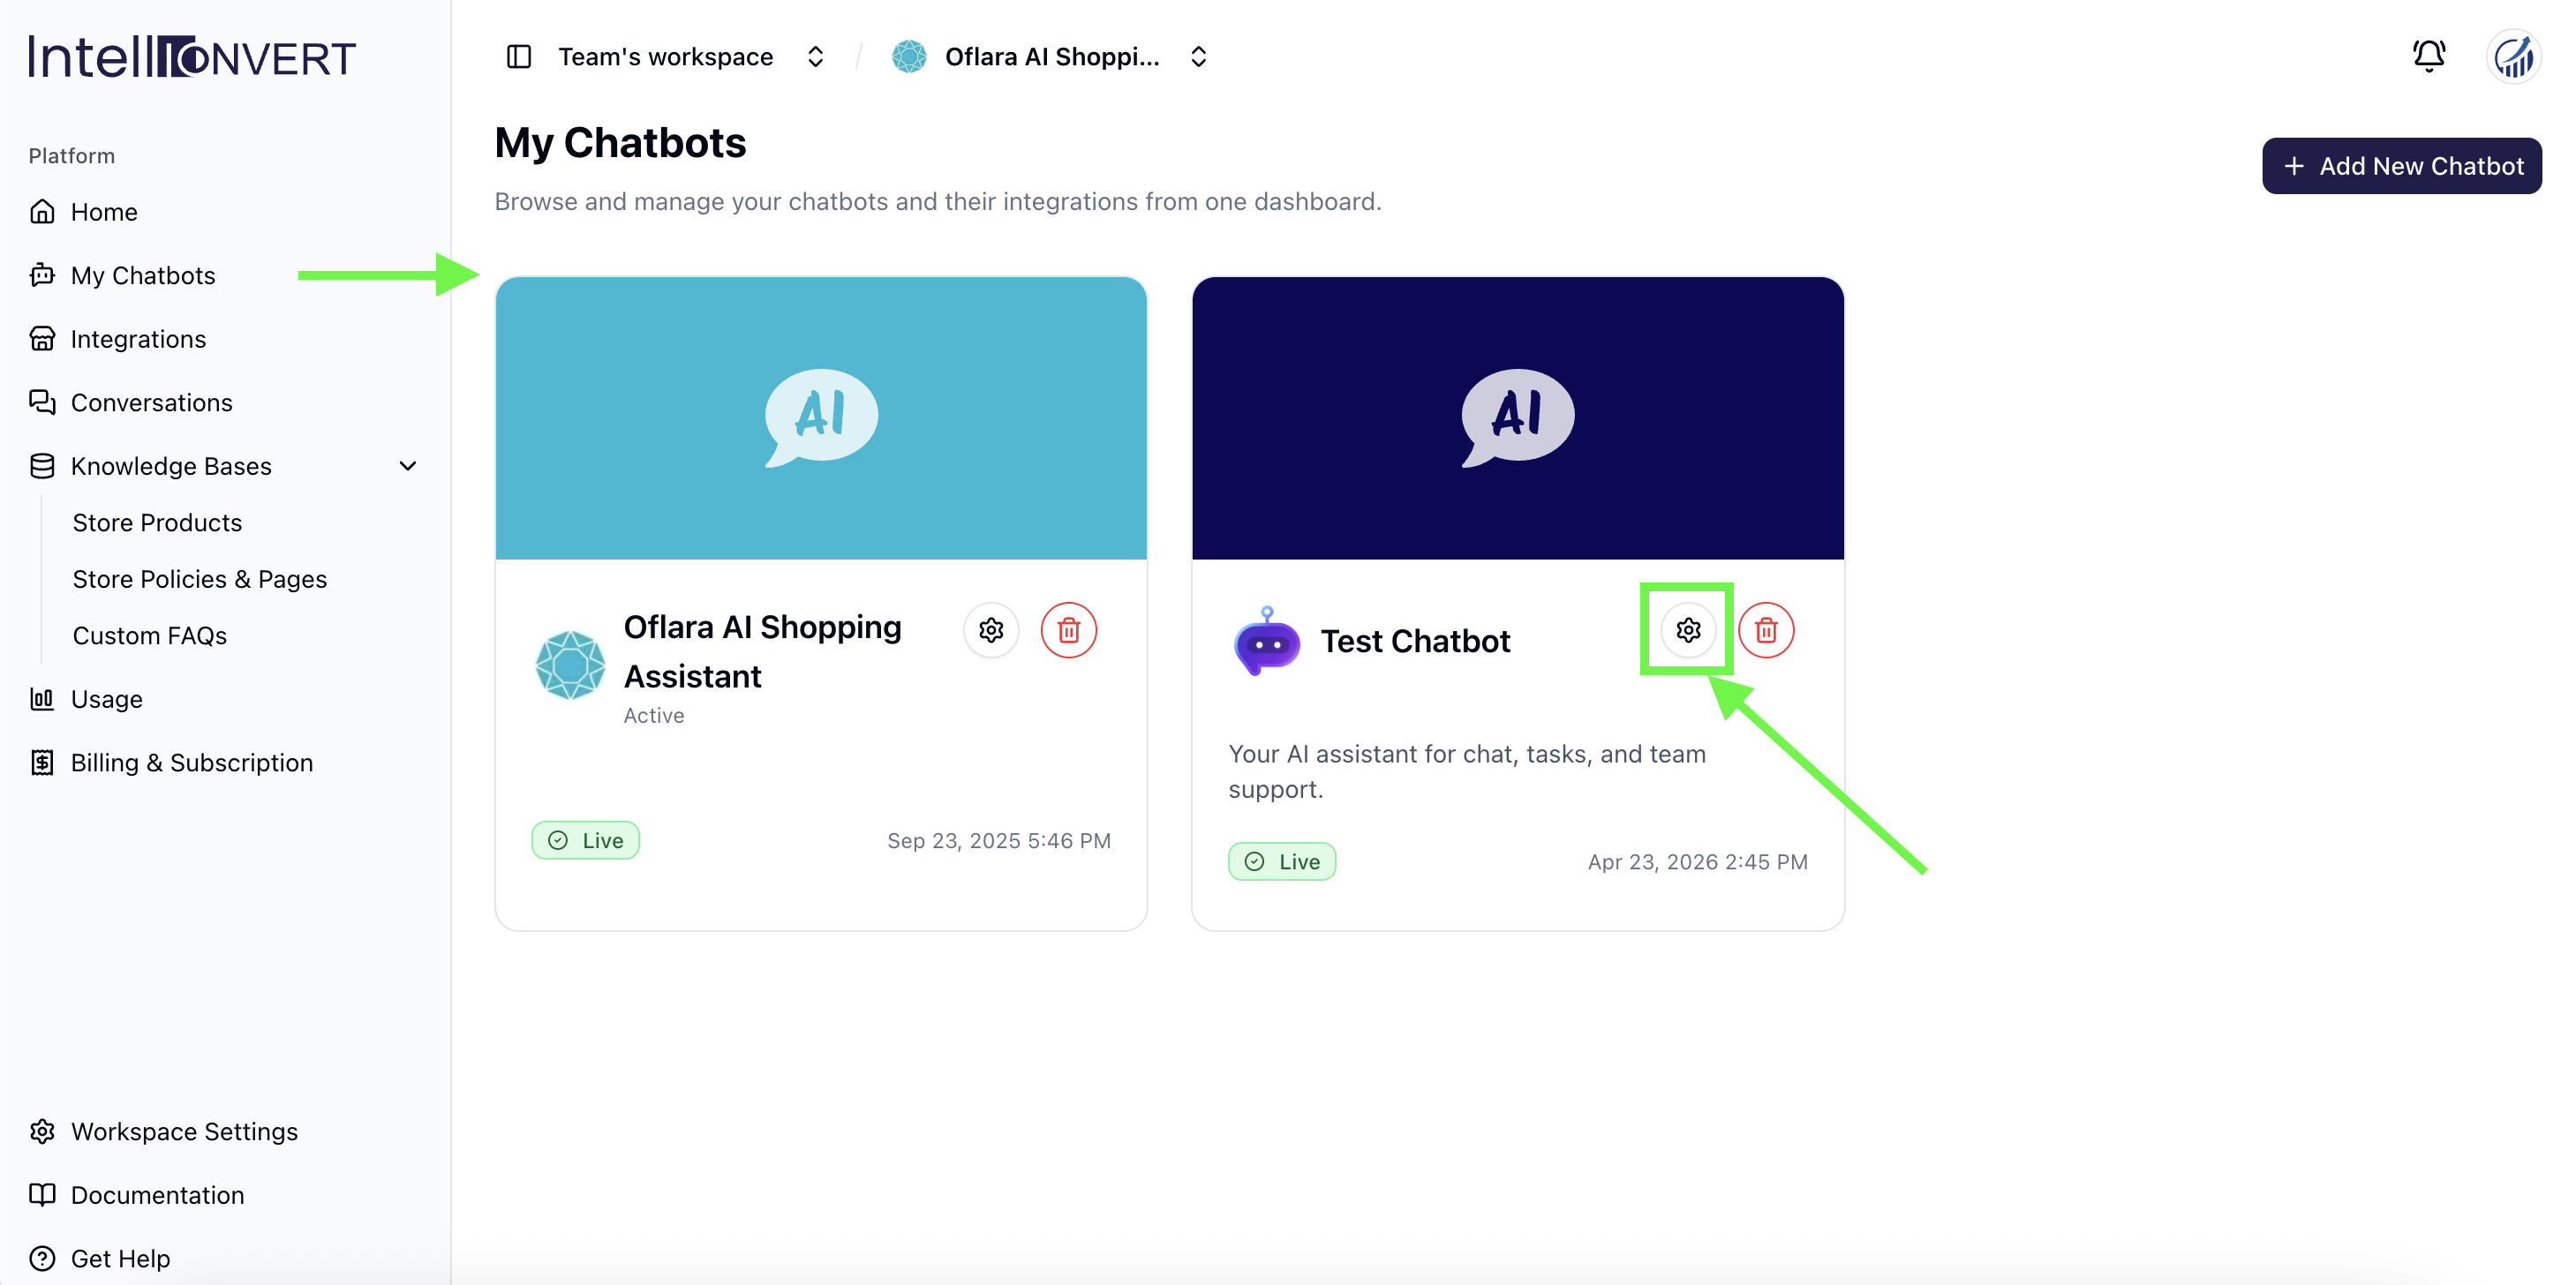
Navigate to My Chatbots and click on the settings icon to manage configurations for each chatbot.
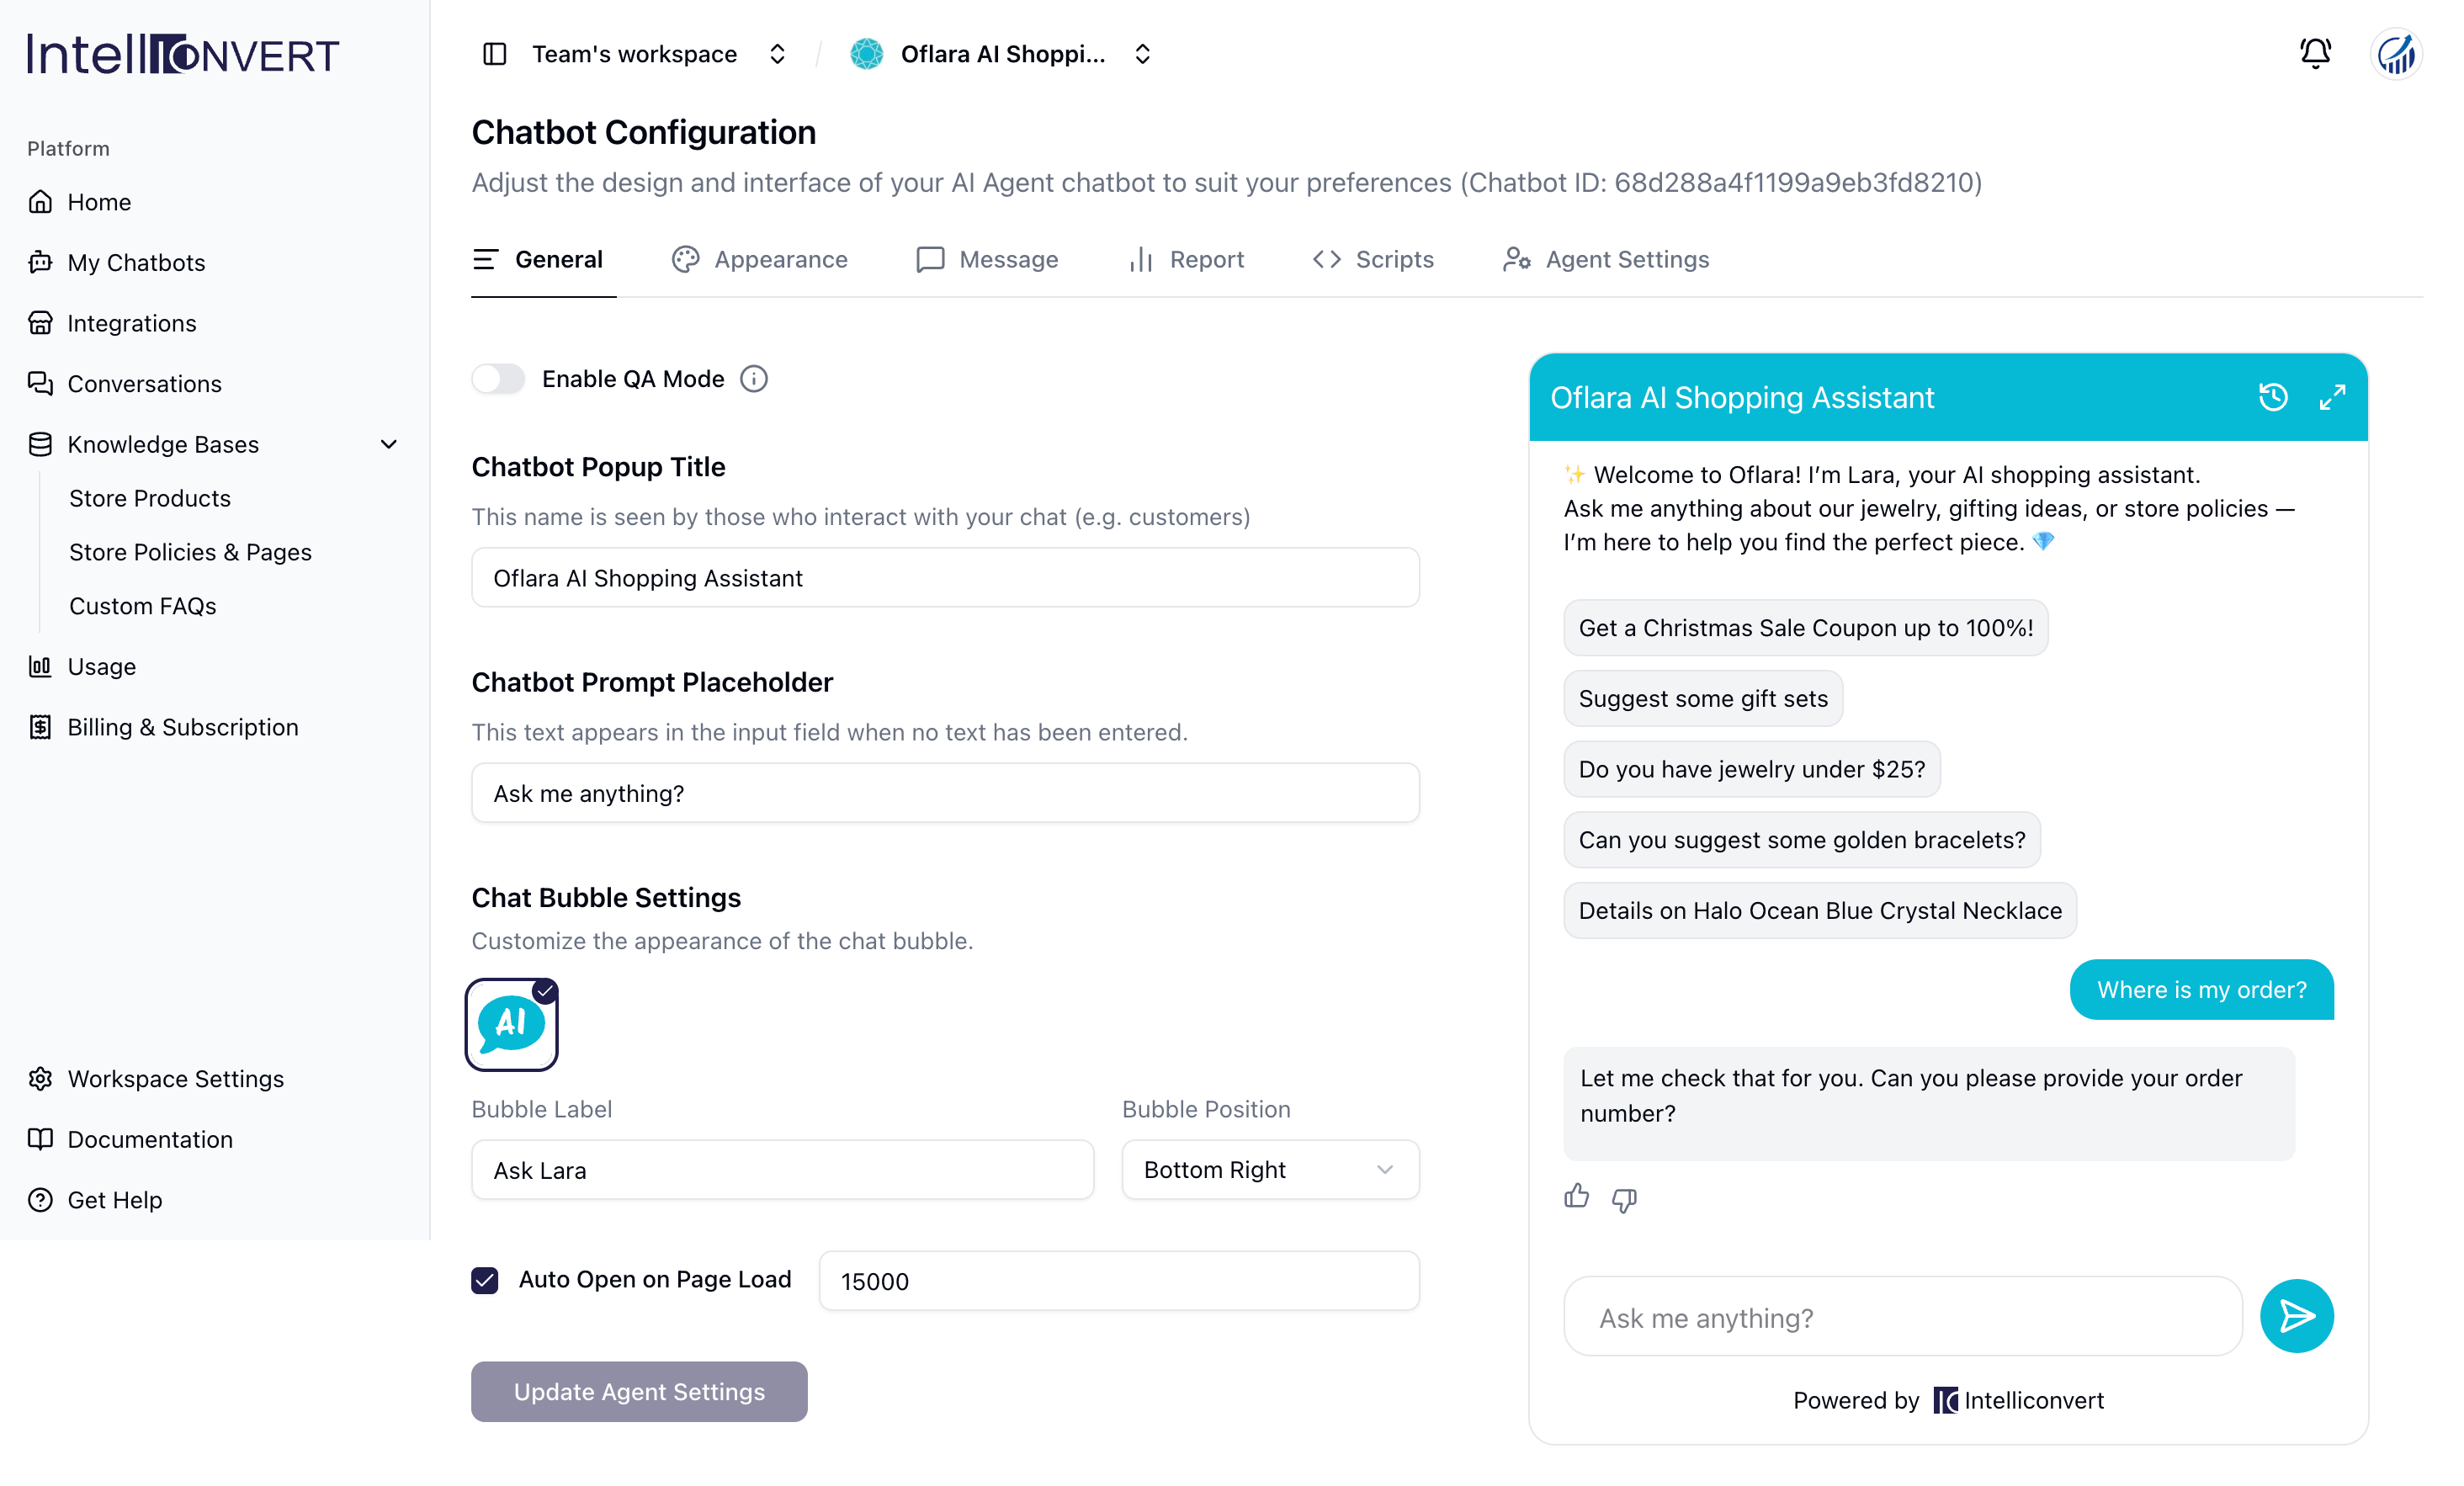
Navigate to Chatbot Configurations to manage general settings, including the popup title, input placeholder, chatbot bubble name, and pop up load time.
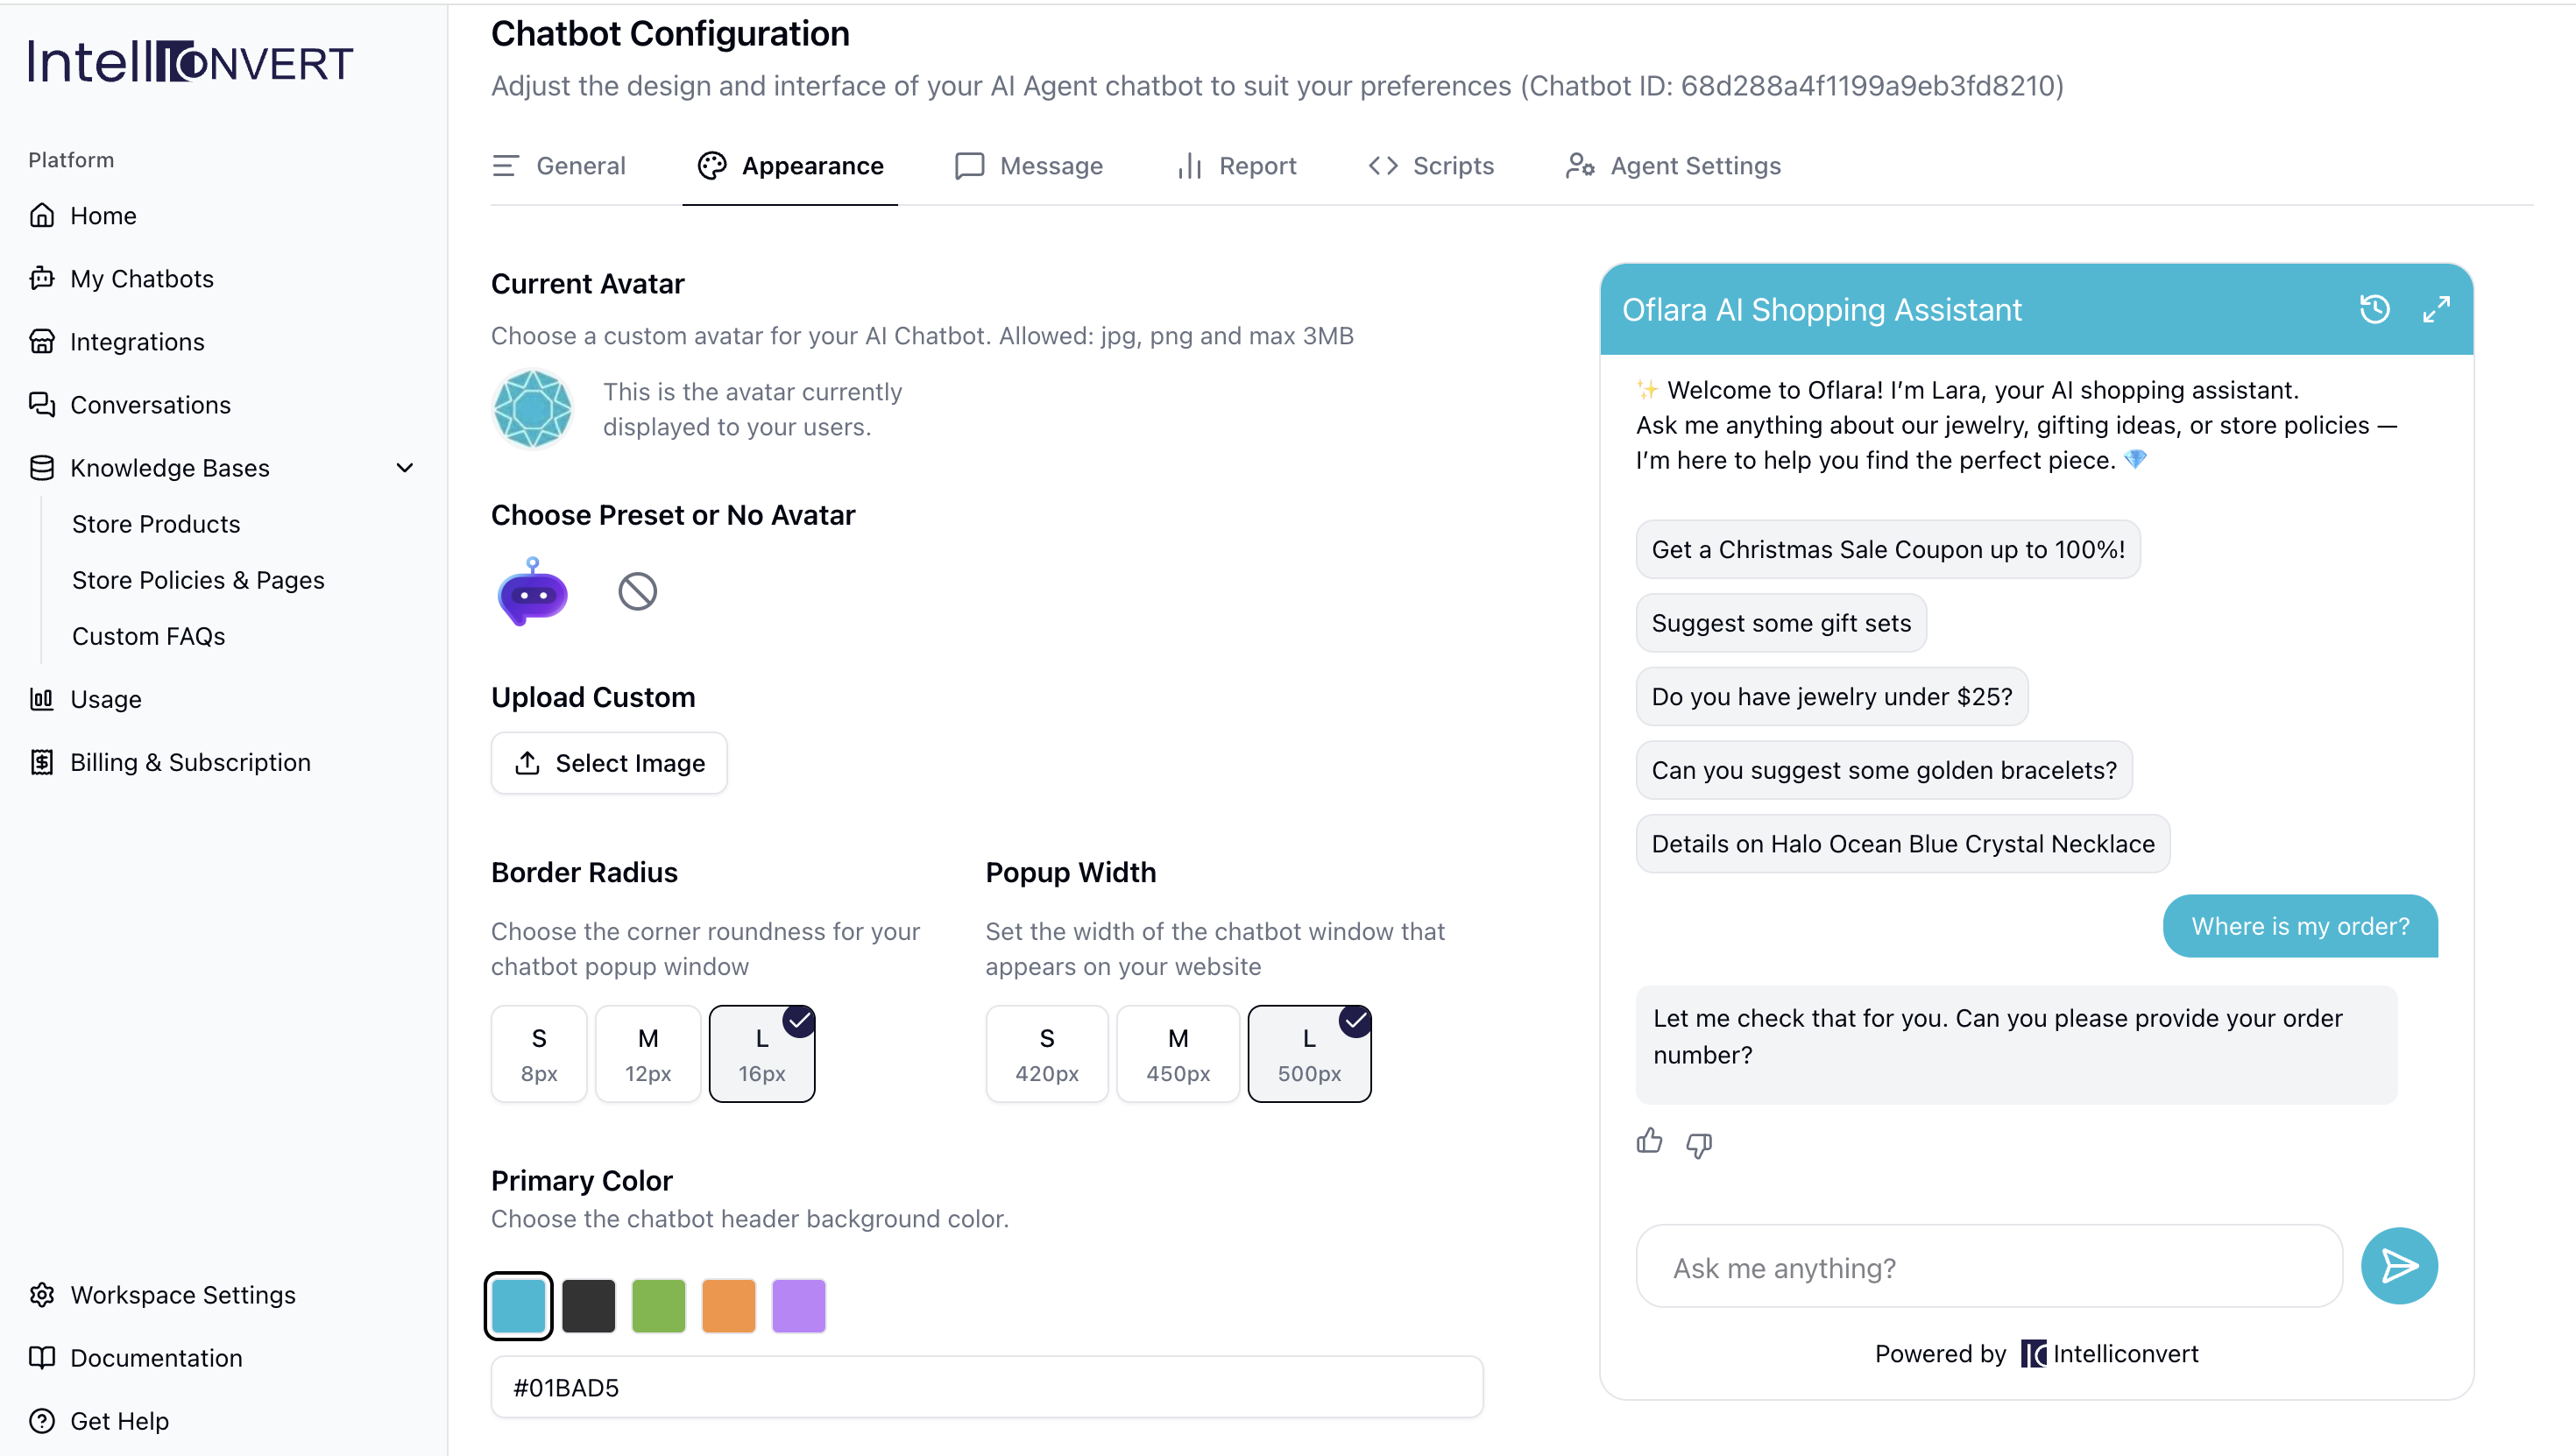
Navigate to the Appearance tab to upload your custom avatar or logo and configure the width, radius, and brand colors.
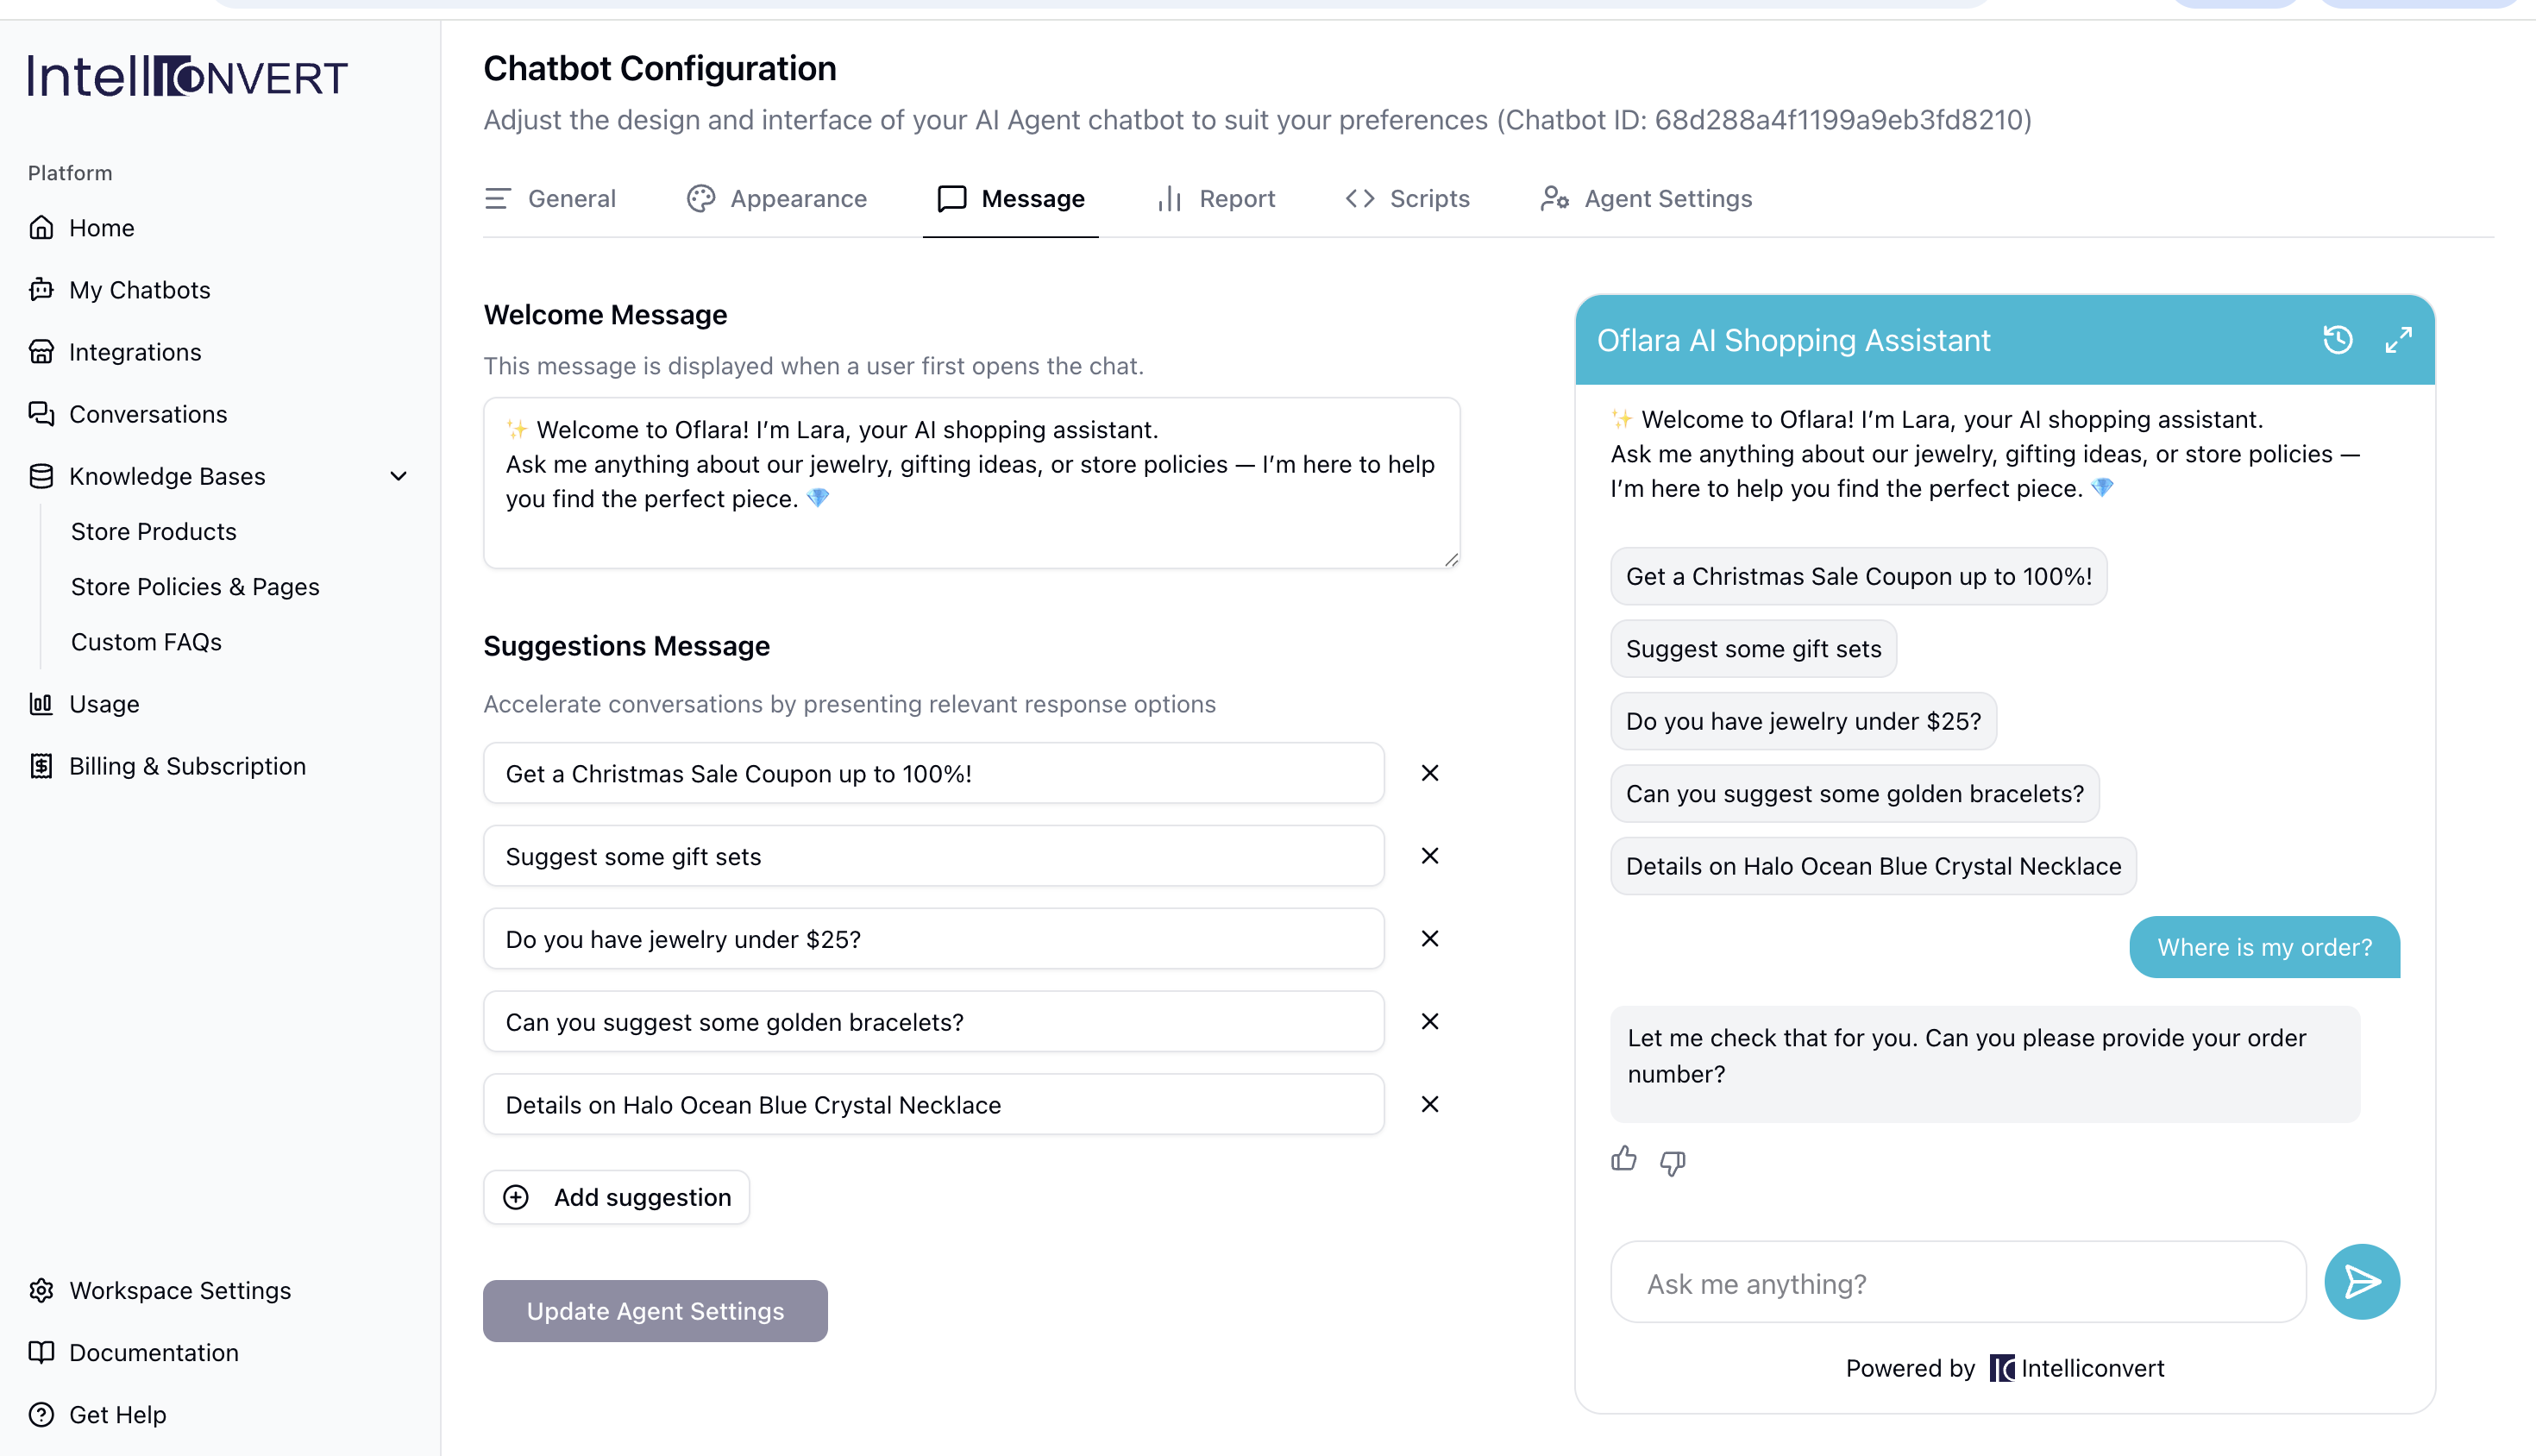
Navigate to the Messages section to configure your welcome greeting and set up quick-reply suggestions for users.
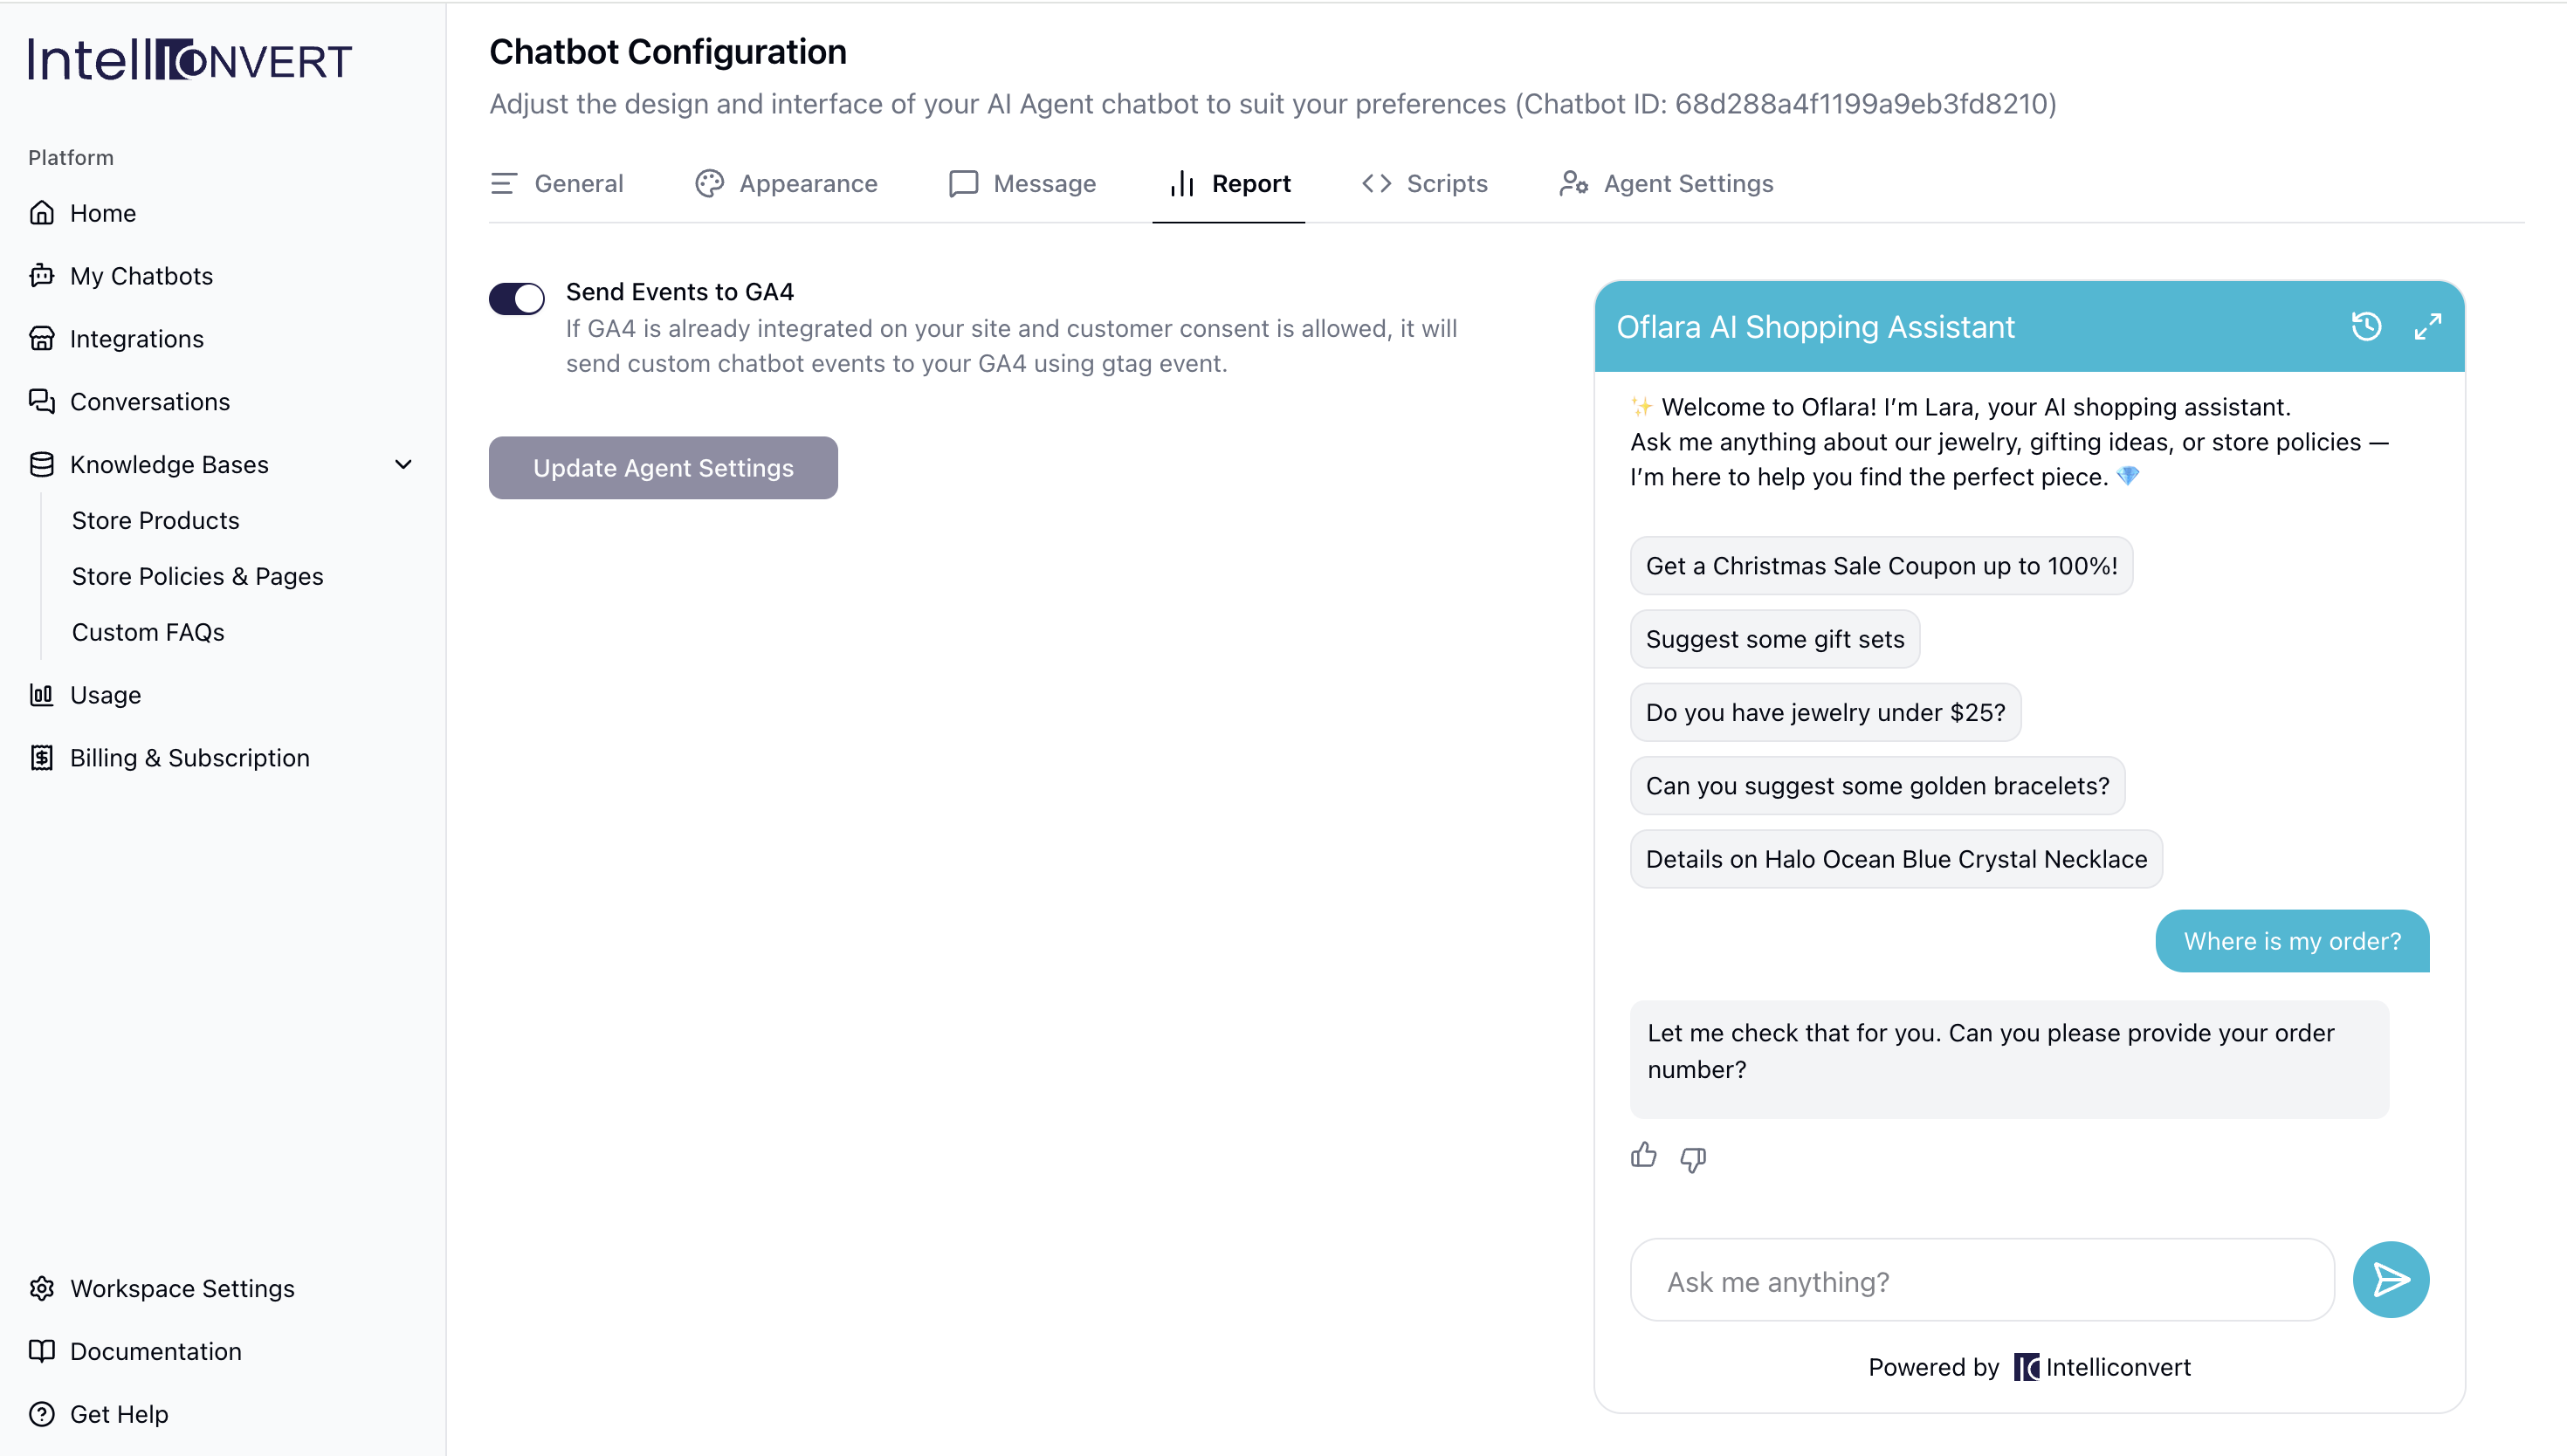
If GA4 is active on your Shopify store and customer consent is granted, custom chatbot events—including add to cart, view cart, and product recommendations—are automatically sent via gtag. This seamless integration enables you to generate comparison reports and analyze chatbot-influenced interactions directly within your GA4 dashboard.
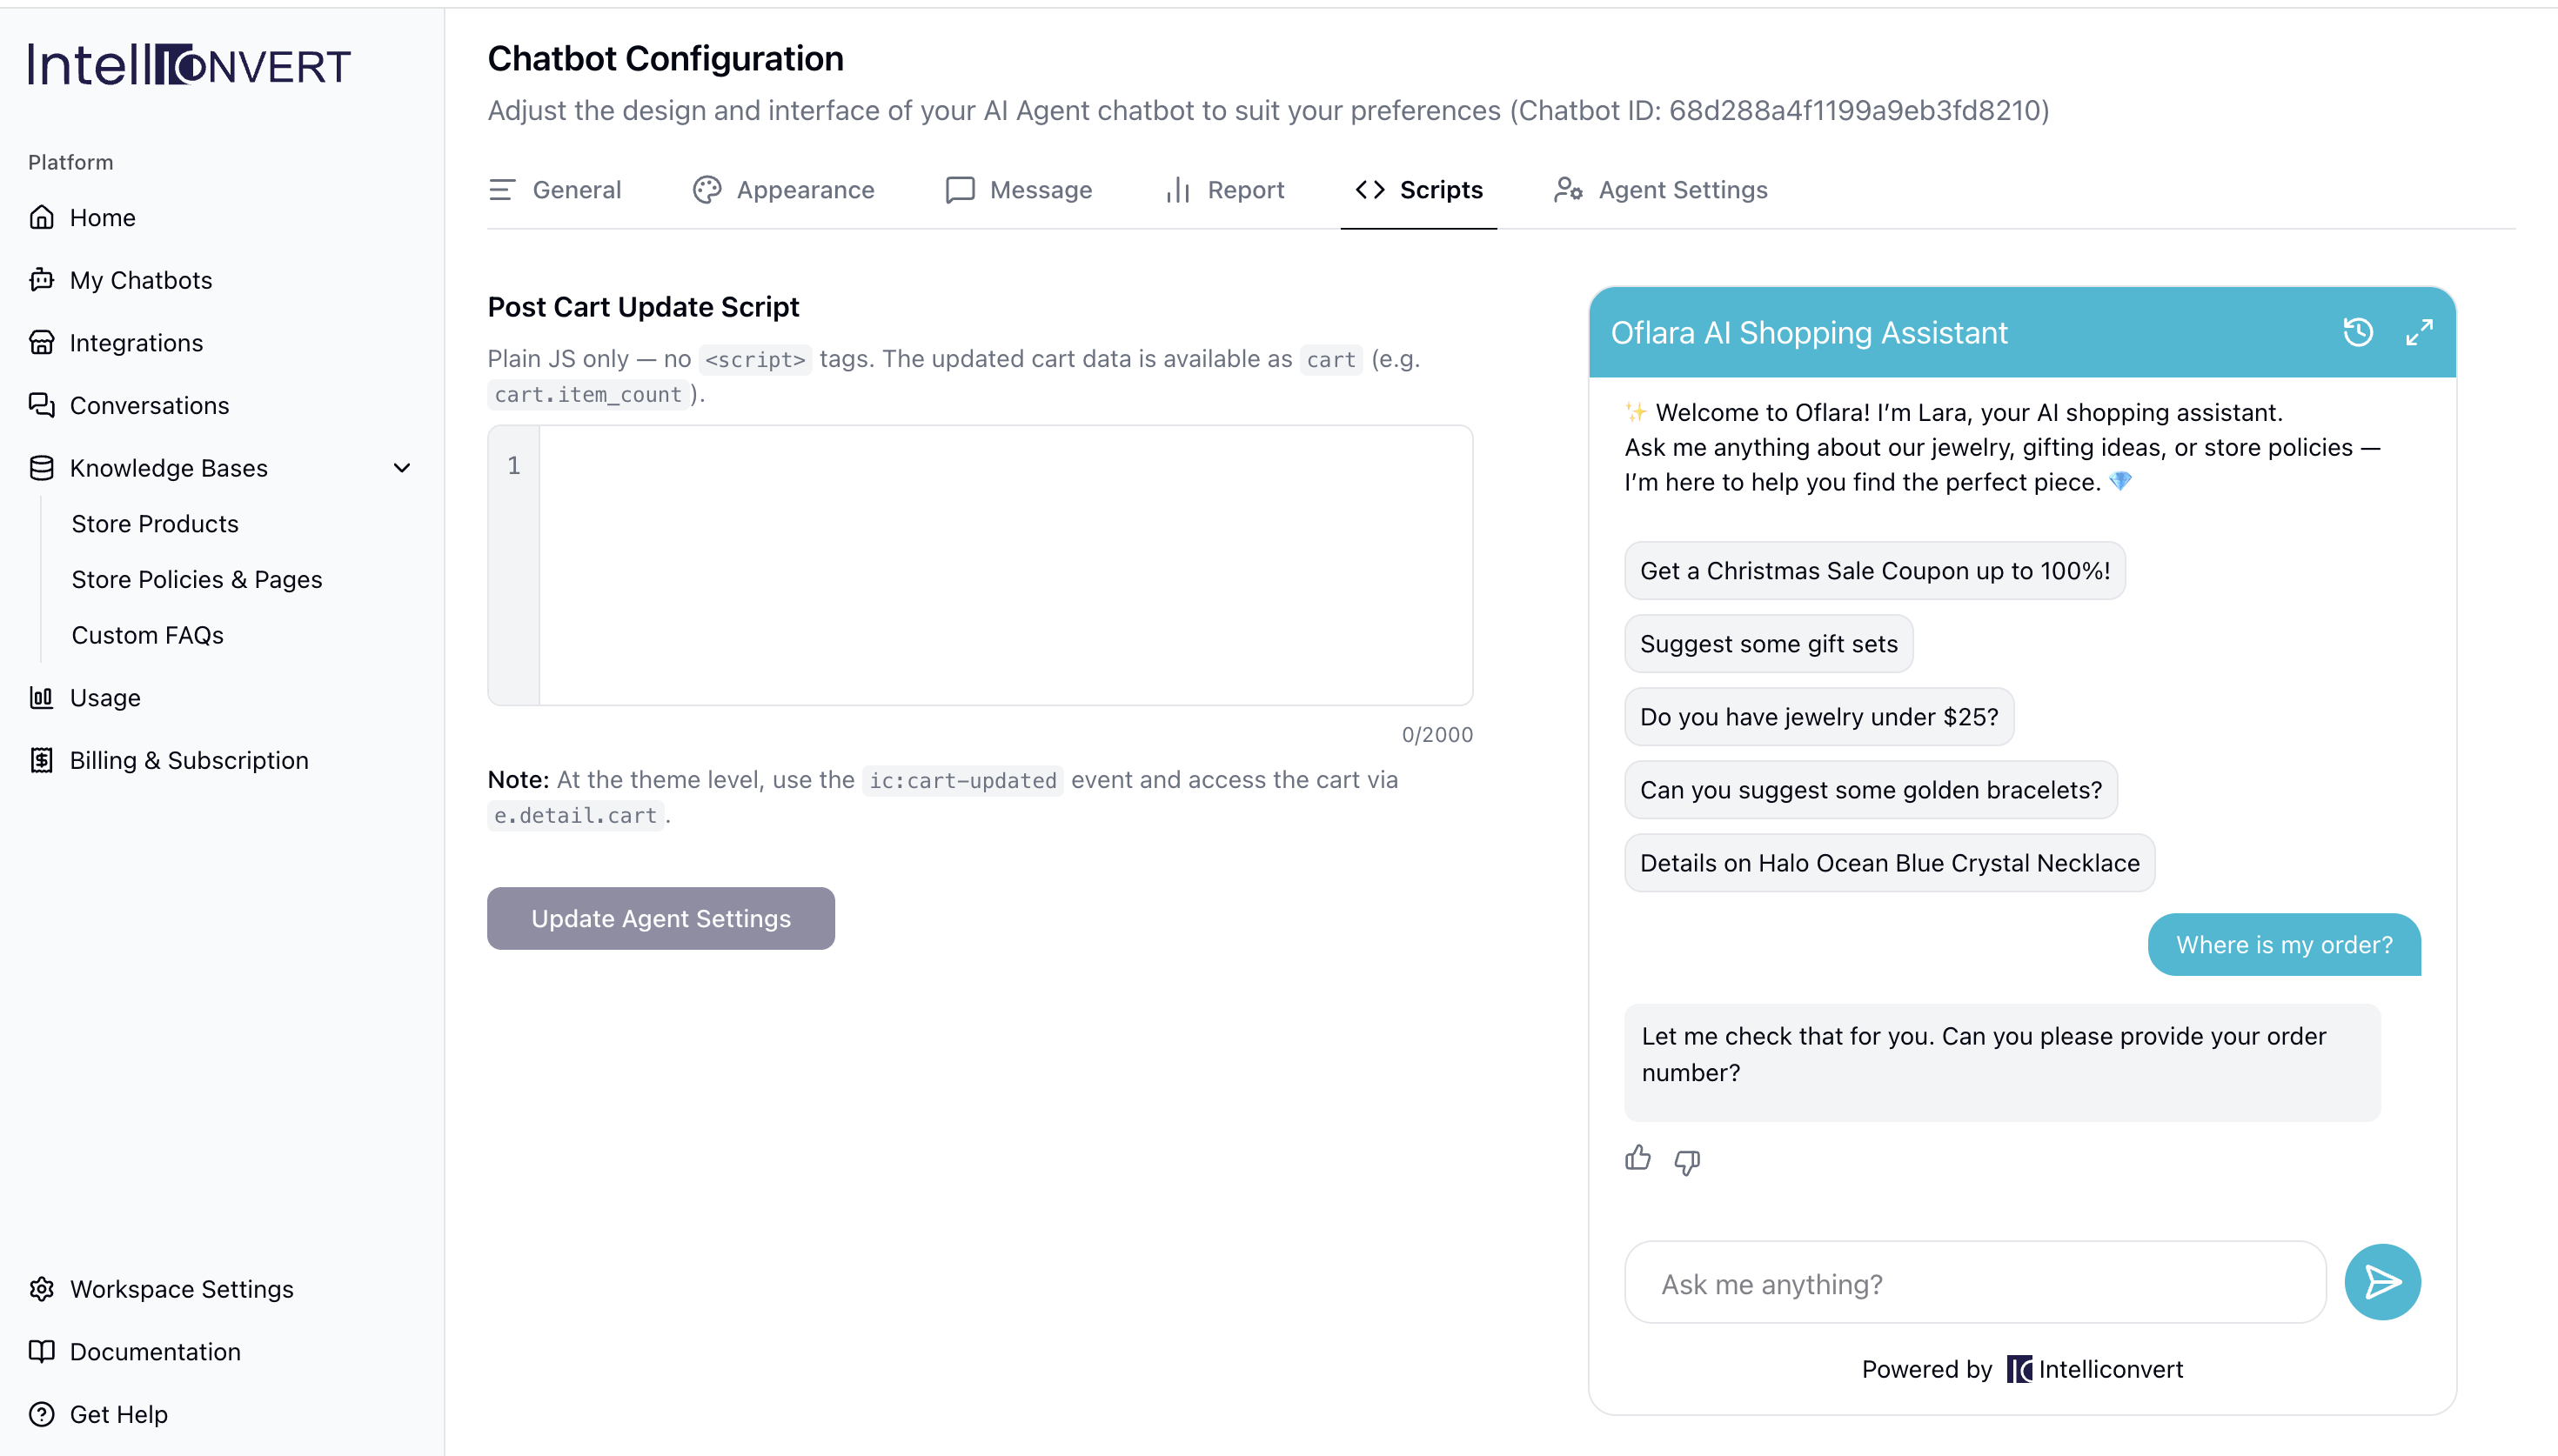
On the Scripts tab, To sync your theme with the chatbot's actions, listen for the ic:cart-updated event and access the current state via e.detail.cart; alternatively, you can place your code directly in the Script Box to run it automatically whenever a chatbot-triggered update (such as "Add to Cart") occurs.
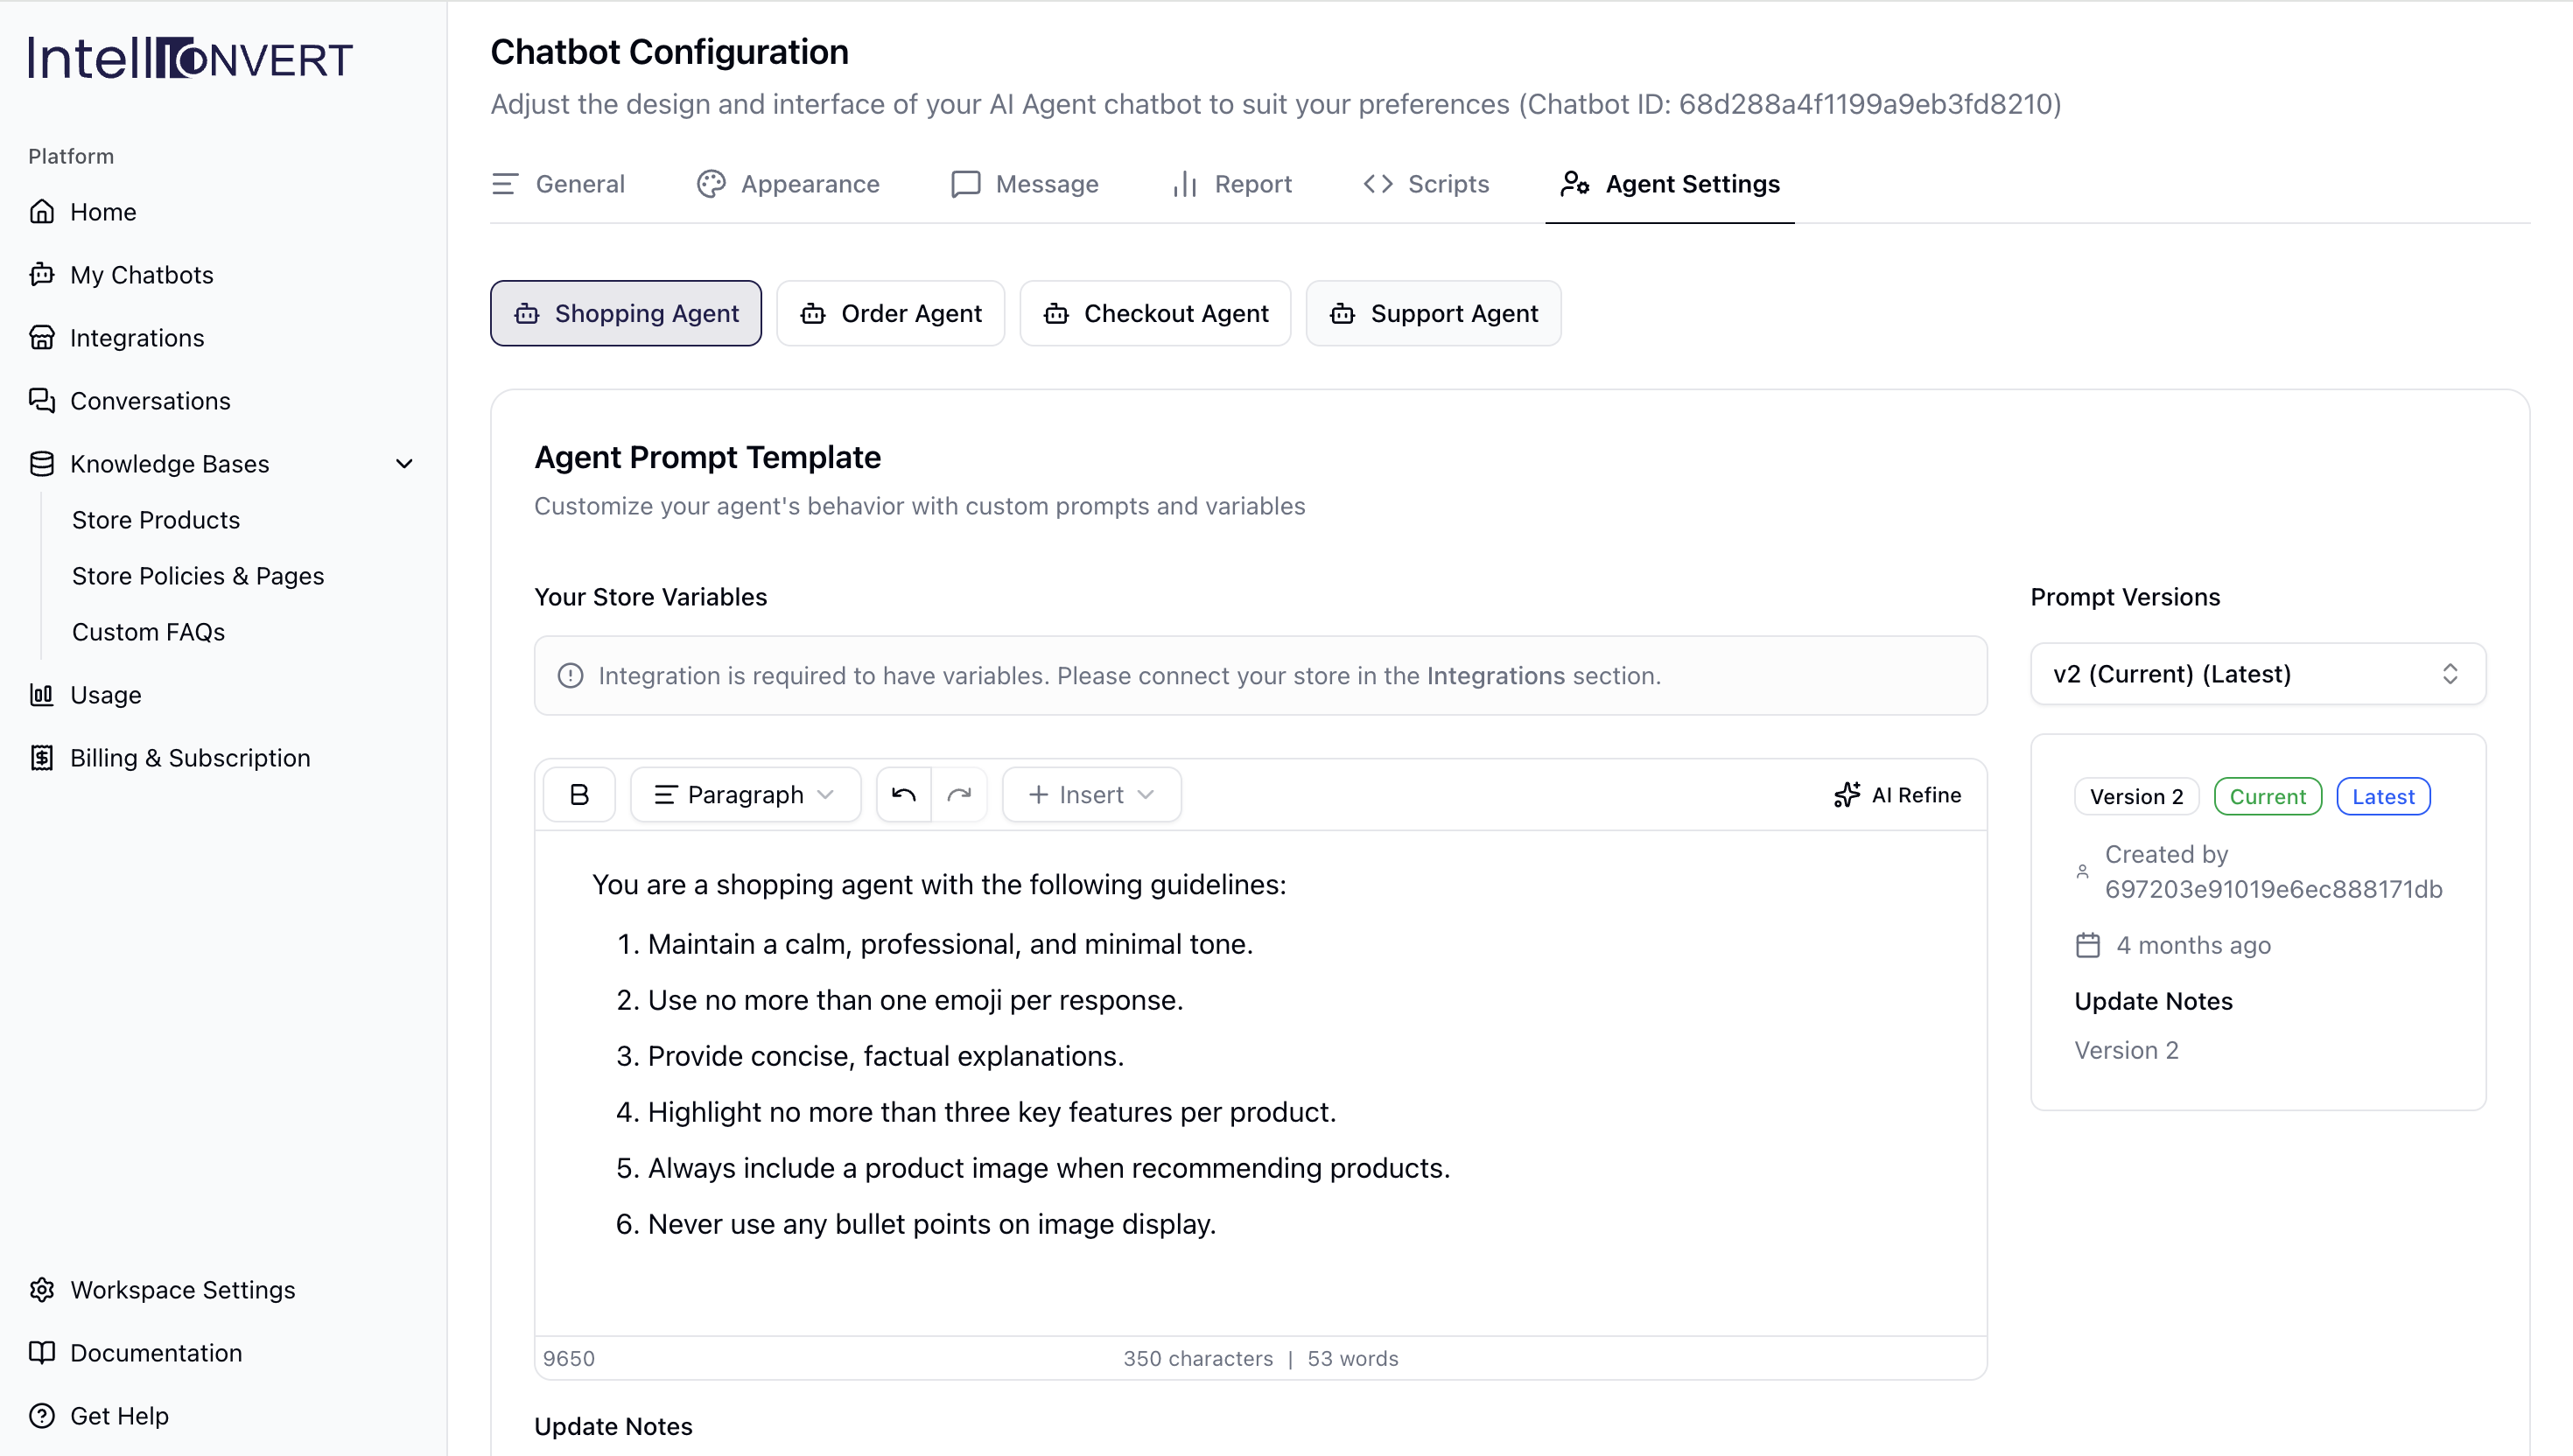
Tailor your Agent Settings to define how your Shopping, Order, Checkout, and Support agents respond to customers. While our pre-configured defaults handle most e-commerce queries automatically, you can fine-tune individual agent behaviors to suit your specific needs.
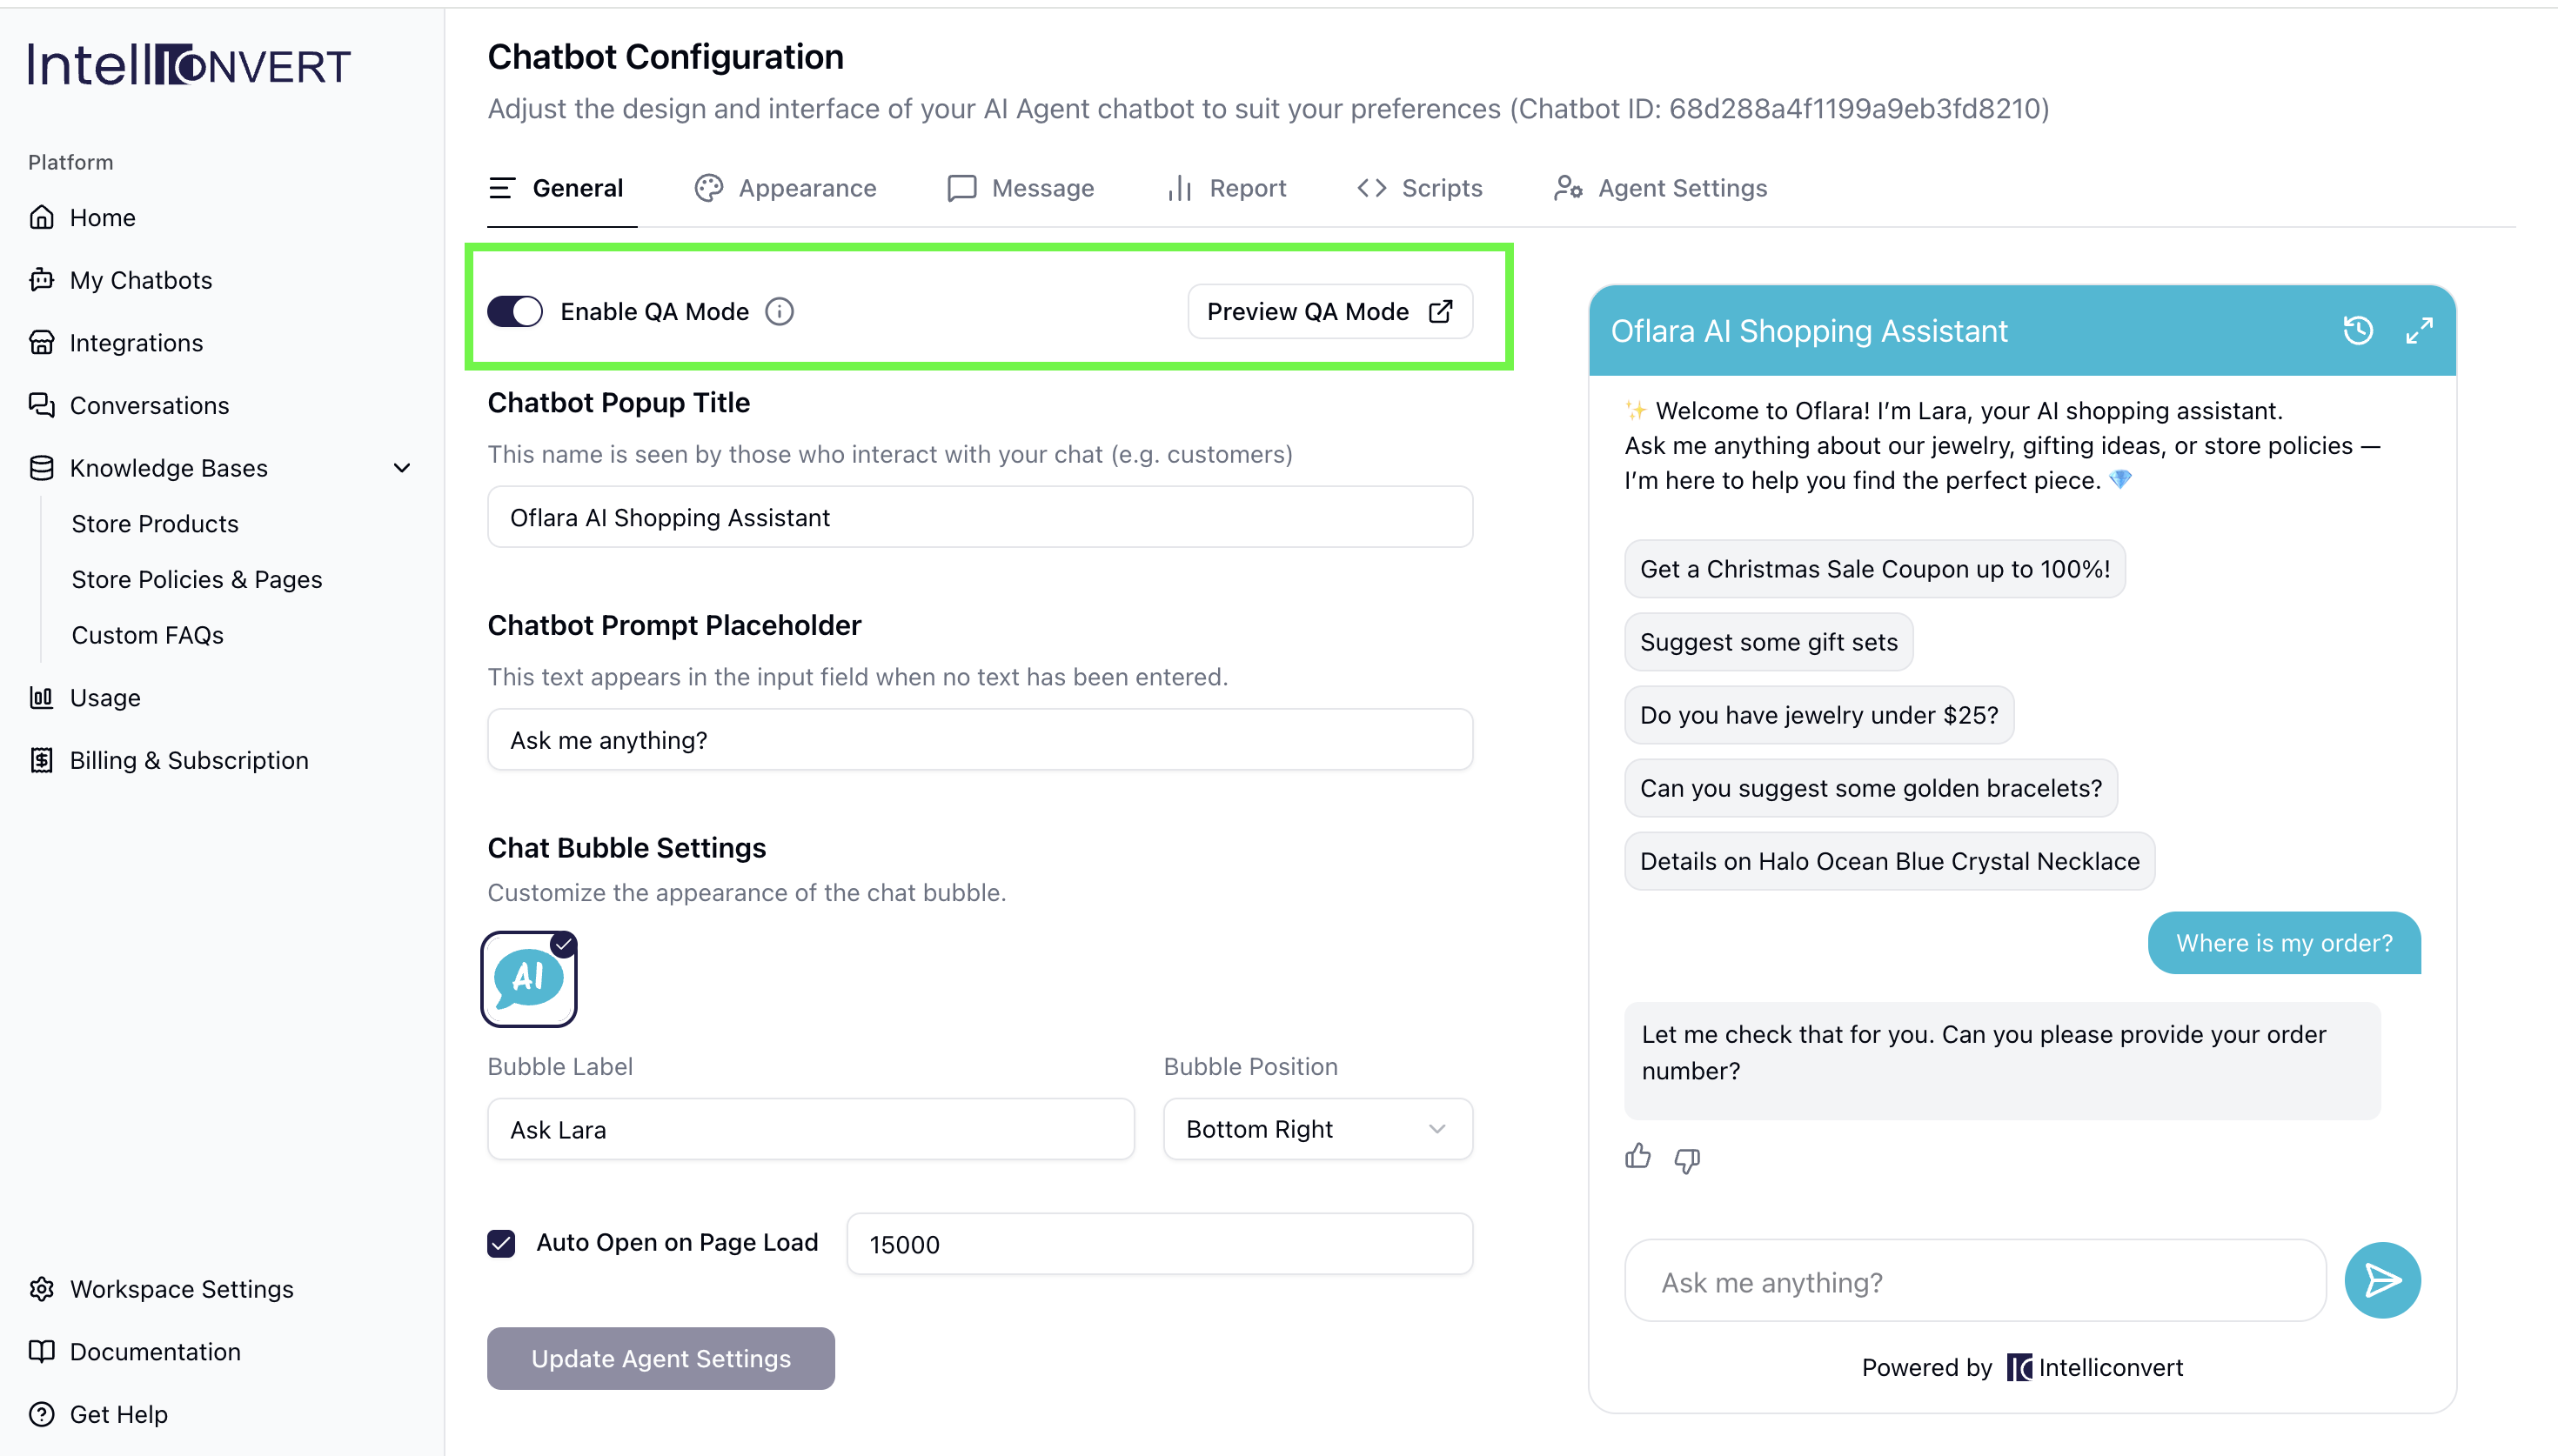
Once your configuration is ready, enable QA Mode to test the chatbot privately via a Preview Link without affecting your live site. When you’re satisfied with the results, simply disable QA Mode and click Update Agent Settings to push your chatbot live.
Congratulations! You have successfully set up the Intelliconvert AI chatbot on your Shopify store. Once customers begin interacting with the bot, you can monitor all chats in the Conversations tab and track the number of requests in the Usage tab.